
Cutting Equilateral Triangles ~ A Tutorial

Cutting 60 Degree Triangles ~ Tutorial by Faith of Fresh Lemons Quilts
Next month, Kati of From the Blue Chair and I are going to be teaching a class at the Sewing Summit called "Shapes and Angles". Kati is going to show everyone how to sew Y-Seams using Hexagons and Diamonds. I'm going to focus on Partial Seams and Equilateral Triangles. Because our class time is limited to 1 hour 15 minutes, we are asking everyone to cut their fabric at home ahead of time and bring the pieces to class.
Kati has posted cutting directions on her blog (here and here). Additional class details can be found in the Sewing Summit Google Group thread titled Shapes and Angles Class.
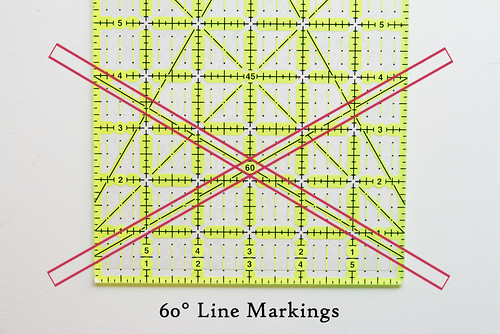
Let's dig deep and try to remember Trigonometry class. I know, it's painful. You probably remember that an equilateral triangle has three 60° angles. In order to cut your fabric for these triangles, you will need a ruler with 60° angle markings - there are two lines that represent 60°. The ruler does not have to be a special ruler for cutting triangles. Just needs the angle markings.
Let's get started!
Cutting Equilateral Triangles
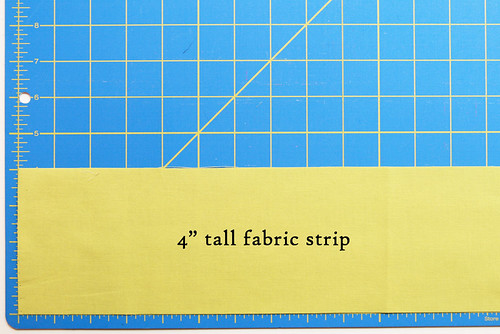
Step 1: Cut a 4" tall strip of fabric.
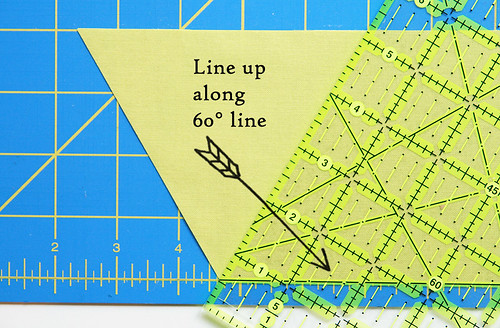
Step 2: Using your quilting ruler, line up the 60° line marking along the bottom of your fabric strip.
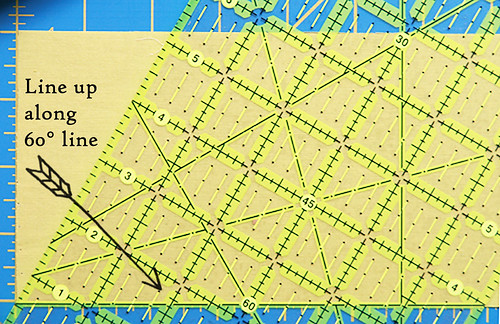
Step 3: Using your rotary cutter, cut your fabric on the ruler angle.
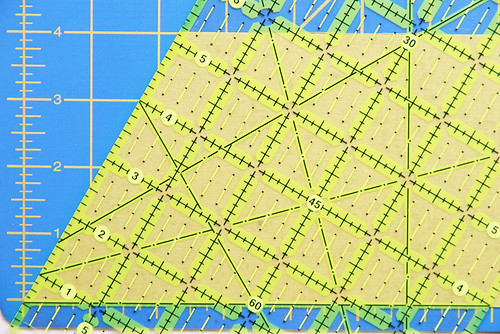
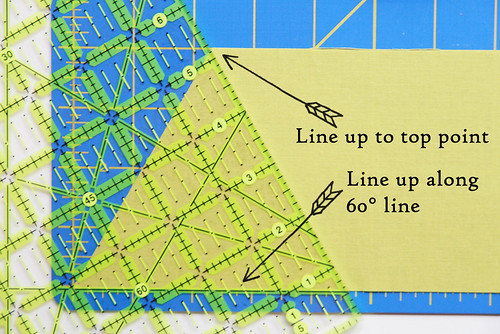
Step 4: Next we are going to cut the third side of the triangle. Remember how your ruler has a 60° marking line going to 2 directions? This time, use other 60° line marking that you did not use the first time. (You will alternate marking lines, every other time you cut.) Make sure the ruler is lined up properly to create the top point of the triangle. Cut your fabric along the ruler edge to create your first equilateral triangle.
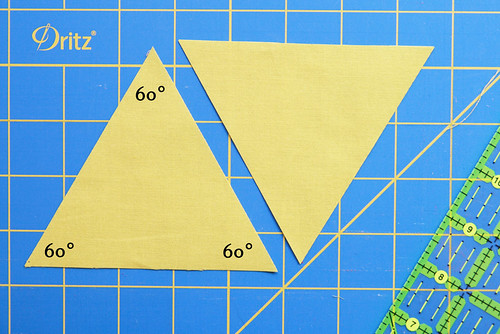
Step 5: Continue down the strip of fabric, lining up the 60° line marking and cutting additional triangles.
Enjoy all your pretty triangles!
A Special Note for Those in my Sewing Summit Class: Bring at least 20 of these triangles to the Sewing Summit class. Although you are welcome to just bring triangles cut from one 42" strip of fabric, you may want to bring a variety of prints/colors for fun.
Please bring the below additional cut fabric pieces for the Partial Seams portion of the class. (32) 1.75" x 5.25" rectangles in various colors/prints (8) 4" x 4" squares in neutral color/print
We will be beginning work on these sample blocks in class:
