
Solstice Star Series : Star of Mystery

Welcome to week 4 of the Solstice Stars Series! Today we will be making the Star of Mystery. Isn't that a great name? This star is from Barbara Brackman's book The Encyclopedia Of Pieced Quilt Patterns,page 349 and the original source of the design is Quilter's Newsletter Magazine (10/74).
This block will be our second paper pieced block of the series. For those of you that were too intimidated to try our first paper pieced star, the Whirling Star, I hope you will join us this time. I have taken nearly 40 photos to document the steps and make you comfortable with paper piecing.
Once again, if you are completely new to paper piecing, I recommend reading through this tutorial and even making the sample block. It will give you a basic understanding of the process. I also recommend reading through the entire tutorial for today's block before starting. And finally, take your time. We will be paper piecing 6 small blocks and then piecing those together.
Star of Mystery Quilt Block Tutorial
Please note, all seams are 1/4″; Final block size 12.5″ unfinished
Reduce your stitch length so that the paper template will perforate easily. I used 1.4 stitch length.
Paper Piecing Templates Print 2 of Template A below and print 4 of Template B below. Be sure to print them at 100% and check the scale icon with a ruler before starting.
Prepare the templates. Cut out the templates around the seam allowance line. Here is a visual of what we are going to make with our templates:

We will be filling in the missing notches with half square triangles (HSTs).
For those that are wondering why I didn't work those HSTs into the templates, I like to make the templates of a size that will print on a home printer without having to visit a copy shop for enlargement. (I figure no one will make the star if it requires that much effort! :)) Adding those HSTs made the templates slightly too big to be printed at home, so we will add those at the end.

Step 1. Cut your fabric. When cutting fabric for paper piecing, you will be cutting rectangles that will be larger than needed.
I recommend cutting 1 of each piece below, making a block, and ensuring it is enough fabric for your sewing style. Then you can make adjustments later for the rest of your blocks. These are the fabric sizes I used for my paper piecing.
White/Background
1A - Cut (2) 4” x 4.25"
3A - Cut (2) 4” x 4.25”
2B - Cut (4) 3” x 6.5”
4B - Cut (4) 3” x 6.5”
Notches - Cut (2) 3.5” x 3.5”, cut diagonal
Color/Print
2A - Cut (2) 4” x 5.5”
4A - Cut (2) 4” x 5.5”
1B - Cut (4) 3” x 6”
3B, 5B - Cut (4) 3.5” x 3.5”, cut diagonal
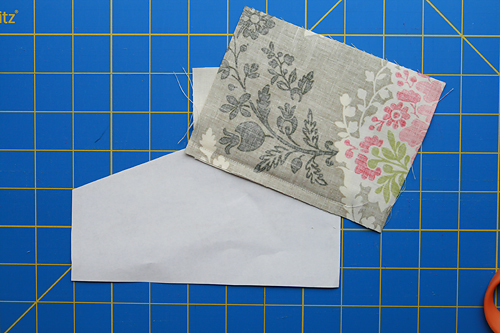
Step 2: Let’s start with Template A. Take your fabric cut for Piece 1A and place it right side out on the back of your template, making sure to cover the entire template space 1A. Pin into place.

Step 3: Take your fabric cut for Piece 2A. Place it right side together to Piece 1A which you pinned into place in Step 2. Hold your template up to the light and make sure at least 1/4″ of the fabric overlaps into template space 2A. This will probably feel backwards and wrong the first few times you do it. Pin into place.

Step 4: Sew along the seam line on the template between pieces 1A and 2A. Be sure to also sew into the grey seam allowance. Remove your pins.


After sewing:
Step 5: Flip your block over. This is what your seam will look like.

Trim your seam allowance to 1/4″.

Your block should now look like this:
Press your fabric open.

Step 6: Flip your block over to the printed side and trim around the seam allowance.

Your block should now look like this:

Step 7: Take your fabric cut for Piece 3A. Place it right side together to Piece 1A and 2A which you have sewn into place. Hold your template up to the light and make sure at least 1/4″ of the fabric overlaps into template space 3A. Pin into place.

Step 8: Sew along the seam line on the template.

Step 9: Trim the seam allowance.


Step 10: Press open and trim around the template.

Step 11: Repeat these steps for piece 4A.

Congratulations! You’ve made your first paper pieced block!
Step 12: Repeat for your second Template A. You should now have the below 2 pieces.

Step 13: Let’s move on to Template B. I will do a quick walk through to get you started. Take your fabric cut for Piece 1B and place it right side out on the back of your template, making sure to cover the entire template space 1B. Pin into place.

Step 14: Take your fabric cut for Piece 2B. Place it right side together to Piece 1B which you pinned into place in Step 12. Hold your template up to the light and make sure at least 1/4″ of the fabric overlaps into template space 2B. Again, this will probably feel backwards and wrong the first few times you do it. Pin into place.

Step 15: Sew along the seam line on the template between pieces 1B and 2B. Be sure to sew a bit into the seam allowance. Remove your pins.

Step 16: Press your fabric open. Trim around your template.

Step 17: Continue paper piecing piece 3B, 4B and 5B. Your block should look like this:

Step 18: Repeat and create the other 3 Template B’s.
Step 19: You now have all 6 templates pieced you need to create the star! Here’s the layout:

Remove the paper from the back. This should perforate easily as long as you remembered to shorten your stitch length before sewing.
Step 20: Sew your 2 Template A’s together. Align the middle seam to ensure the center points align when you sew the block together.


Resulting block:

Step 21: Now we will sew 2 of your Template B’s to opposite sides of the block. Line up your seams again.

Resulting block:

Step 22: Take your remaining Template B blocks and sew the remaining HSTs to the sides as shown:

Step 23: At this point, I decided to trim my HSTs to be even with my Template B blocks. I kind of wish I had waited to trim everything even at the end when I was squaring up the block. I will leave it up to you as to when you trim these, but at some point you should trim them.


Step 24: Now we will sew the last 2 Template B’s to the corners to finish the block.

Line up your seams again and sew.

After sewing all the corners to the center block, you’re done! You should have a beautiful Star of Mystery!

Be sure to post any questions as well as a photo of your finished block in the Flickr group!