
Scrapbuster ~ Potholder Tutorial
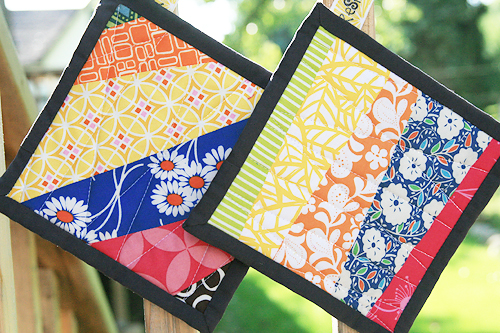
My box of fabric scraps is getting to be a bit out of control. Today I decided to actually put those little pieces of leftover fabric to use and make some potholders. And if you have never made potholders before, now is your chance! Below are the directions, and just because I like ya, a template of the pattern I used to make mine.
These potholders measure 7" x 7" which is a good size for my hands. But if you prefer yours larger, simply enlarge the templates that you will print in Step 1.
Supplies:
1) 11 strips of fabric
2) Insul~Bright Insulating Material. Mine was found in the interfacing section at JoAnns, sold by the yard. You will need two 8" squares.
3) 8.5" square fabric for backing
4) Bias tape for binding and optional hanging tag. If you want to make your own bias tape, cut out two 2" x 32" pieces. If you make your own hanging tags, cut out two additional 2" x 4" pieces.
5) Scissors
6) Printer and tape for pattern
Optional Supplies:
1) 505 Spray Adhesive or safety pins for making quilt sandwich
2) Quilting ruler
3) Rotary cutter
4) Self healing mat
5) Water soluble marker for marking quilting lines
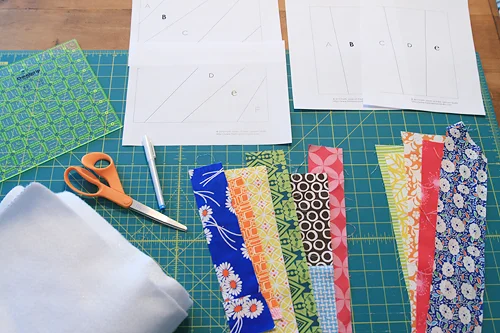
Step 1: Print the following PDF templates . ** Be sure to print your templates at “Actual Size” or “100%”, NOT “Fit to Page”. There are 2 pages for each potholder. Tape together. Then cut out the pieces.


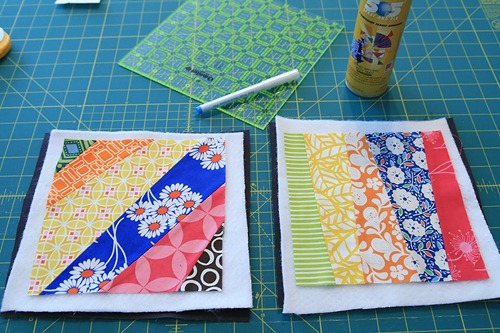
Step 2: Select a piece of fabric for each pattern piece. Cut out fabric. I used a rotary cutter and my quilting ruler, but you can also just trace the pattern pieces with a pencil or water soluable marker and cut out with scissors.
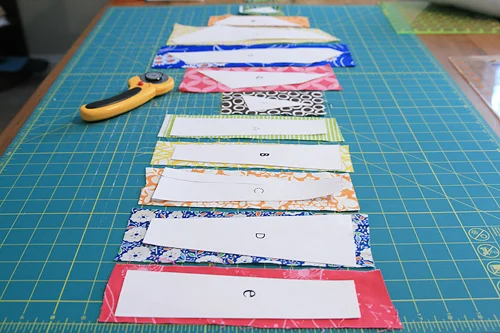
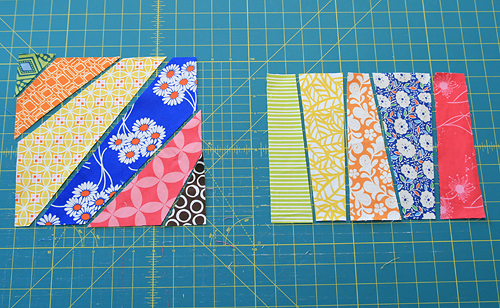
Step 3: Sew the pieces together using a 1/4" seam allowance. Don't worry that the sides of your final square don't all line up. We will be trimming these down when we square the blocks next step.
Step 4: Square your finished blocks to 7" squares.

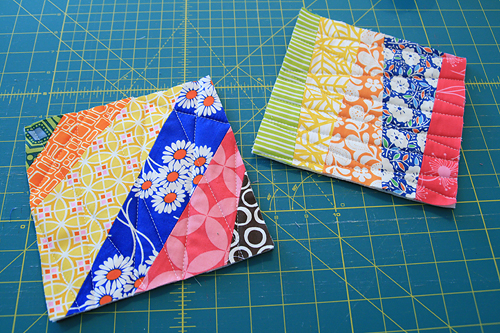
Step 5: Make your quilt sandwich with the backing fabric and the Insul~Bright. For smaller projects like this, I use 505 Spray Adhesive. You can also use the pinning method. If you have never made a quilt sandwich before, check out my tutorial here.
Step 6: Quilt your potholders. Be creative! I did random straight lines with a stitch length of 3 for a modern look. I quilted these on the fly, but optionally you could mark your lines using a water soluble marker. Simply use a water bottle to spray the fabric afterwards and the lines will disappear.
Trim of the excess Insul~Bright and backing.
Step 7: Create your bias tape and add the binding. If you’ve never made binding before, check out my tutorial here.
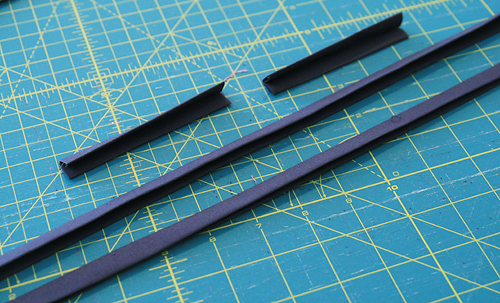
If you decided to add a hanger, sew it to the edge under the binding. I used some of my quilt tags made from twill tape but you can use coordinating fabric, designer fabric selvage, ribbon...

Step 8: Stand back and admire your new kitchen accessories! Or, if you are my 3 year old daughter, your new "baby doll beds". :)
